|
I’ll get right into this one. Lots of students ask me about recording from home and while it helps to have a real sound-booth with top-of-the-line microphones and equipment, there are LOTS of cost effective ways to take an average room and get a almost-studio sound without breaking the bank. Here are my recommendations for the basic equipment you need to get recording from home: [NOTE: I am NOT an expert. Engineers and sound designers like George Whittham and his like can tell you all about sound and sound absorption. They can design just the right space for you, long term. This article is meant only to help the novice get started with reasonable recording success while on a budget. Please don’t email me with your corrections and suggestions on how to better engineer a booth or set up. You’d loose me on paragraph one.] Mics today come in several varieties. For the home voice actor there are lots of options out there. Let’s break down your choices and help you to refine your search for the right one: 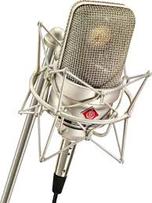 condenser microphone condenser microphone 1.) Dynamic vs Condenser My understanding is that a Dynamic microphone - otherwise known as a stage microphone - registers and transmits sound without amplifying them. This means when you are at a concert and the rockstar blows your eardrums as he hits the high notes, you are hearing the amplification of the sound from an amplifier unit separate but connected to the mic. Plug the same mic into a weaker amplification unit and there will be no bleeding from the ears on “Don’t Stop Believin.’” Condenser Microphones are the kind you see in studios and have amplification built into the mic itself. These mics still run to amplification units or sound boards, but the signal they send is already boosted. So there is some consistency in sound from the mic regardless of the external amplifier. These mics require their own power source - this is often a switch or button on the soundboard or pre-amp that says “phantom power.” For the voice actor, stick to a condenser microphone. You’ll get better sound more consistently, and it gives you the freedom to change your system when necessary without loosing quality or amplification. Part 1: Microphones 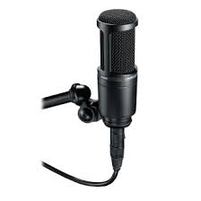 AudioTechnica AT2020 AudioTechnica AT2020 2.) XLR or USB? Huh? Exactly. Lemme break it down. XLR XLR refers to the kind of cable connection used in attaching a microphone to a soundboard or amp. It is that familiar-looking mic cable that has a 3-pronged male side and a three-holed female side. This is the kind of cable and mic set up you will find in most studios, and that works well with all standard sound boards and pre-amps. The upside to this is that you have control over the settings of the microphone independent of your computer or recording device. Also the sound quality tends to be clearer and more stable to the well-trained ear. For your first XLR microphone I highly recommend the AudioTechnica AT2020. This is a solid mic with good sound and a sharp, clean ring to it. The cost is around $100, and I will say that mine has proven to be a solid investment as I still use it regularly. But if you grab one of these, or any other XLR mic, you'll need some extra equipment: 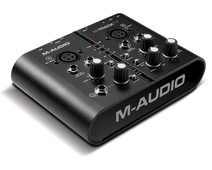 MTrack Plus MTrack Plus 2-A) Microphone cable - you’ll need an XLR cable to hook your mic up to your pre-amp. They are pretty cheap. You can get a reliable 25-ft. cable for around $20. 2-B) In order to hook your mic up to a computer or other digital recording device, you need a Pre-Amp. This is a miniature sound board that amplifies the audio signal, provides phantom power to a condenser mic and translates the audio into a USB output. I started with the M-Audio Mobile Pre and that seems to have been discontinued, so I will recommend it’s closest relative, the M-Audio MTrack Plus. 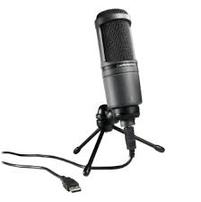 AT2020 - USB AT2020 - USB USB A USB mic is just that. A condenser microphone that is designed to interface with the computer directly through one of the computers USB ports. This means that you actually control the microphone settings and amplification through your computer’s audio control software. The upside to this is you get the richness and quality of a condenser mic without the middleman of a soundboard or pre-amp, as well as portability for when you're on the go. The downside is you have to run the sound settings from your computer, which can be tedious. And you run the risk of losing sound quality as USB can be finicky and create electronic noise on your files. Having said that, there are some great options out there. Remember that AudioTechinca AT2020? Well, there’s a USB version. 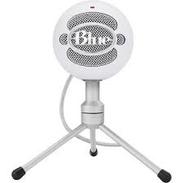 Snowball Snowball Other great mics in the same price range include the Snowball by Blue. When it first debuted, this mic became ubiquitous among voice actors for auditions on the road. It gives a solid sound and is easy to pack and travel. The great thing about the affordable Blue mics is that they tend to feature “trickle down” technology from their high-end microphones and last a long time with great stability. Eventually, you will want to upgrade to a more expensive microphone like a Neumann or Sennheiser and a better recording environment like a proper sound booth or studio, but in the mean time, you can get started with minimal investment and a maximum output for pennies on the dollar and get your career underway. MIcrophones are just the beginning. But they are a great place to start. Other equipment in the starter kit that I'll give blog post to include: sound dampening, recording software and phone/tablet options. For now, investigate some microphones: you can find a lot of quality items for reasonable prices and start capturing your audio right away.
0 Comments
Your comment will be posted after it is approved.
Leave a Reply. |
AuthorThis is the Mick Wingert Website. The blog is by Mick unless otherwise specified. Mick's Bio can be found here. Archives
October 2015
Categories
All
|
 RSS Feed